
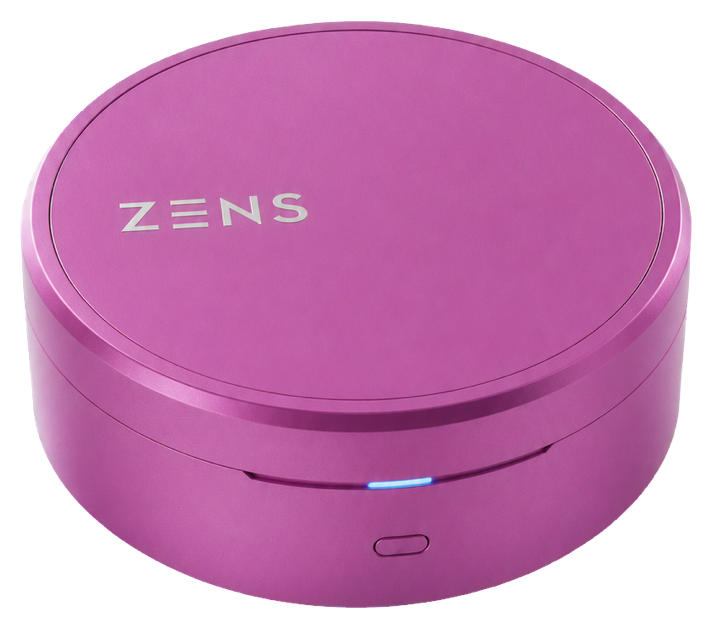
Charging Case× 1
AI TRANSLATION EARBUDS
Follow the illustrated steps to charge, connect and control your ZENSBUDS AI.
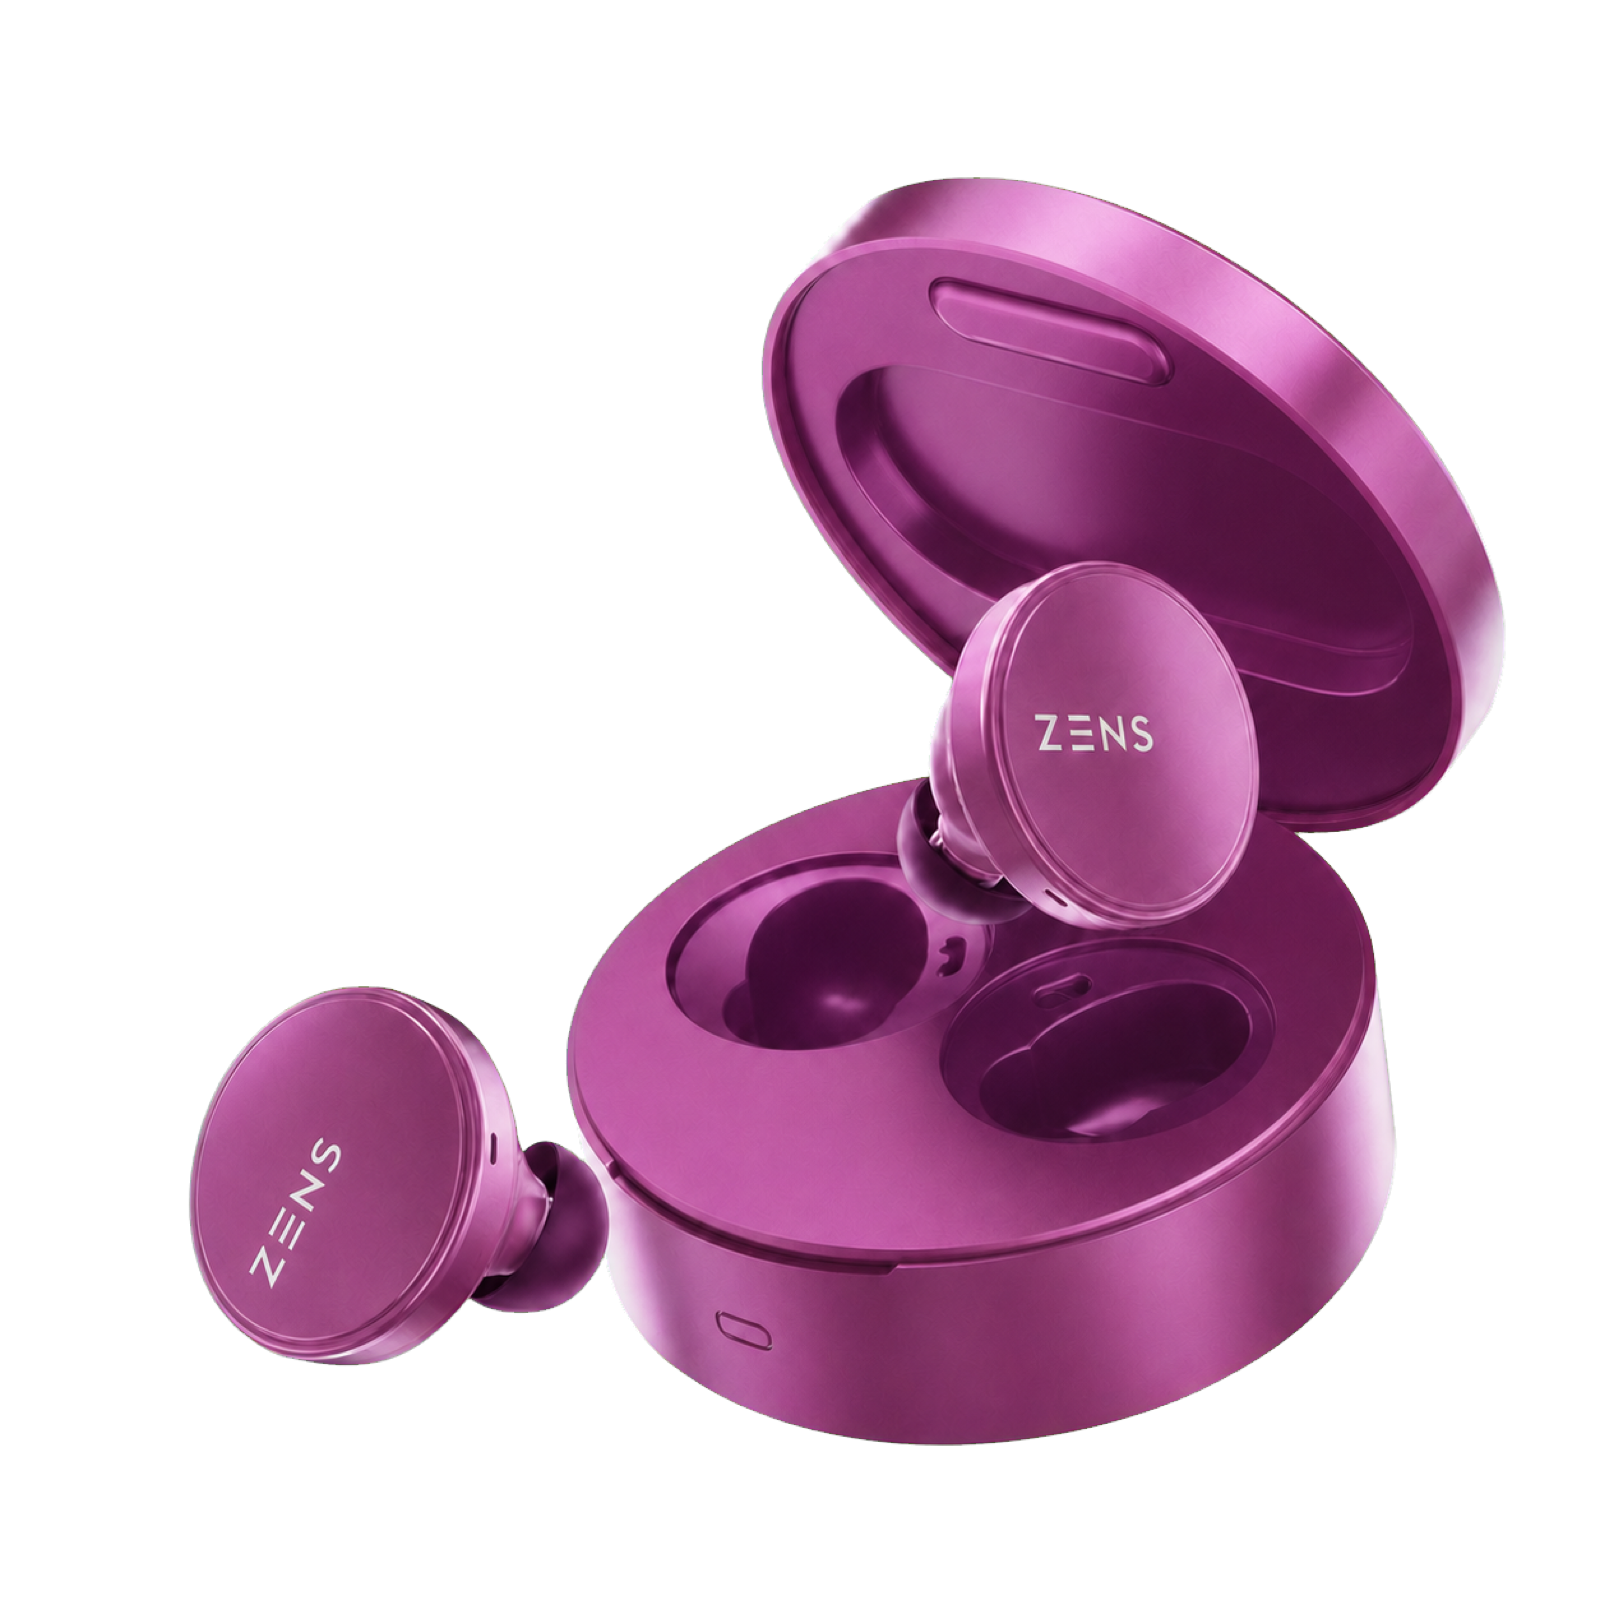
01 / UNBOX
Check that these items are present before setup.



Accessory images are based on the supplied product photos. The listed package contents have been confirmed; ear-tip sizes are still awaiting confirmation.
02 / KNOW YOUR EARBUDS
Three visible touchpoints guide everyday setup and use.
1 Touch Area
2 Charging Slots
3 Reset And Indicator
Tap or hold the outer face of either earbud.
Seat both earbuds fully in their matching case slots.
Check the charging indicator guide below. Read the reset conditions before using a reset control.
03 / POWER
Seat Both Earbuds, Connect The Case And Check For Charging Activity.

Match left and right, place both earbuds fully in the charging slots, then close the lid to charge them.

Connect the charging case to a compatible USB power source.

The case indicator pulses orange while the case is charging. Check the guide below for other states.
CAD-based views. Cable and rendered light colour are illustrative; use the indicator descriptions below.
Opening the lid: verification pending. The factory test marked this item NG: the specified 10-second white light was observed as three white flashes instead. Neither pattern is used here as a reliable charge-level or pairing confirmation.
Factory reference charging time: approximately 1.5 hours for the earbuds and approximately 1.5 hours for the case. Charging conditions were not supplied.
04 / CONNECT
First pair the earbuds with your phone. Then check their connection in the ZENSBUDS AI app.
Open the case lid to power on the earbuds.
On your phone, open Bluetooth settings and turn Bluetooth on.
Choose “ZENSBUDS AI” from the available-device list.
Wait until your phone shows Connected, then check audio playback.
Open The Case
Bluetooth
Device
Select “ZENSBUDS AI” in your phone's Bluetooth settings. This is the connection name in the factory UI for the shipping firmware.
Open the charging case to turn the earbuds on. Return them to the case and close the lid to turn them off and charge. With no connection, the earbuds turn off automatically after 5 minutes.
For later use, enable Bluetooth on the previously paired phone and open the case nearby. If automatic reconnection fails, select “ZENSBUDS AI” again. Both earbud indicators turn off after a successful phone connection.
NEXT / APP CONNECTION
After pairing your earbuds with your phone, open the app and check whether your earbuds are shown as Connected.
Download the official ZENSBUDS AI app using a store link below, then open it.
If the earbuds are not already connected, tap “Pair New Device” and follow the onscreen device-connection instructions.
Confirm the app shows Connected before translating through your earbuds.
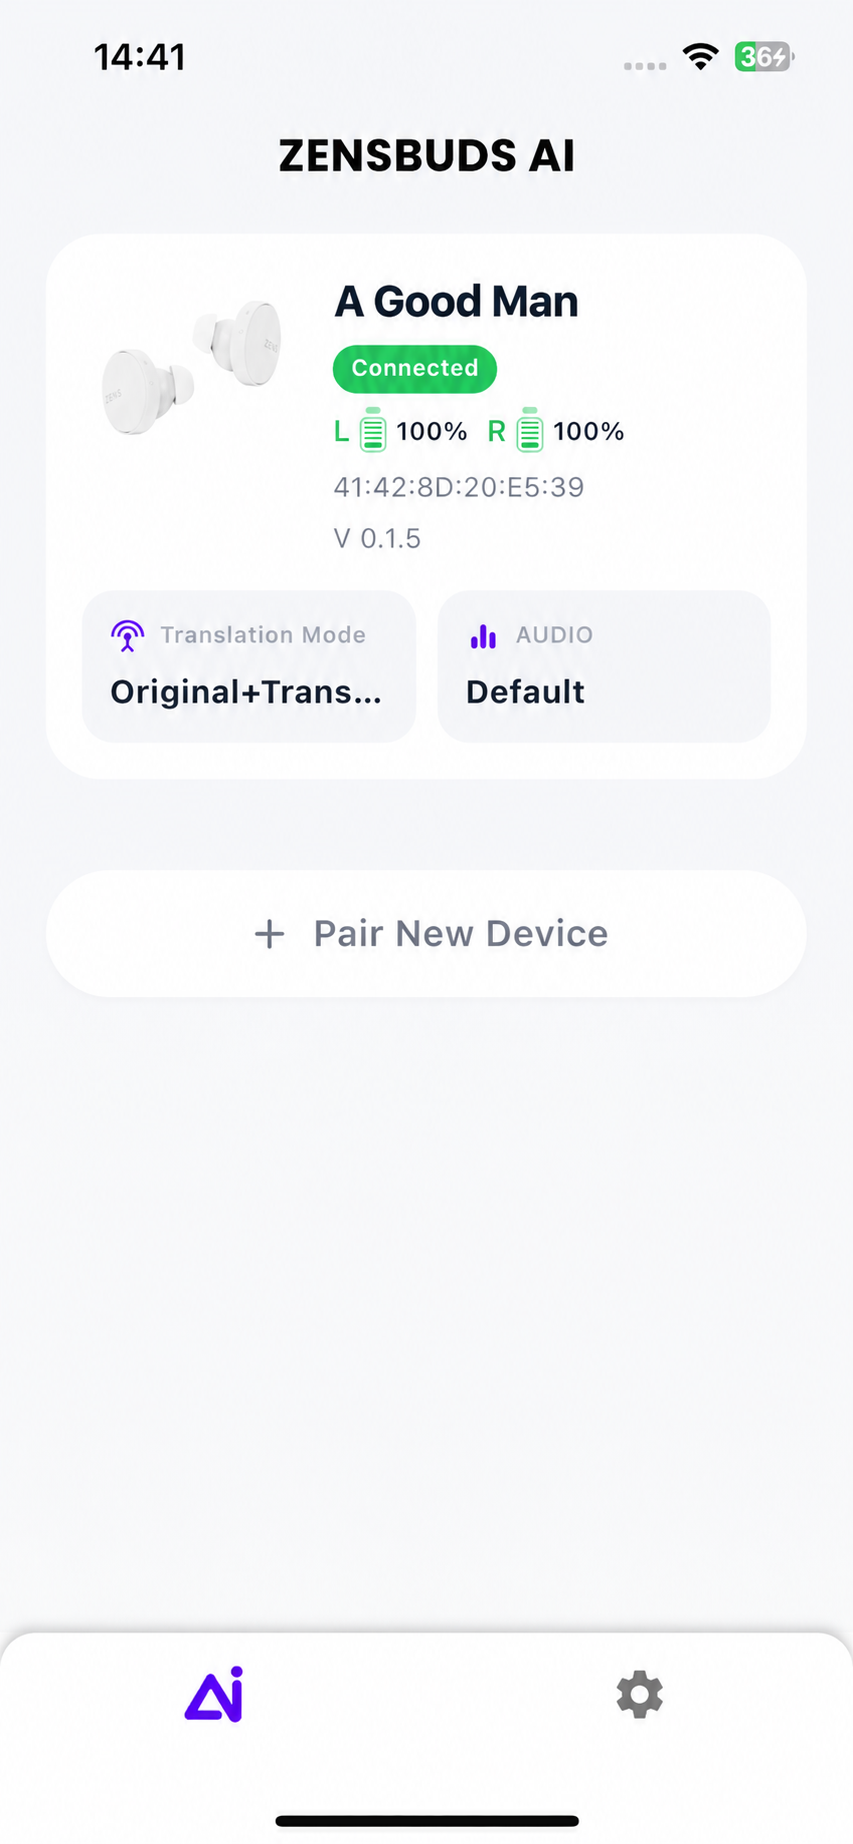
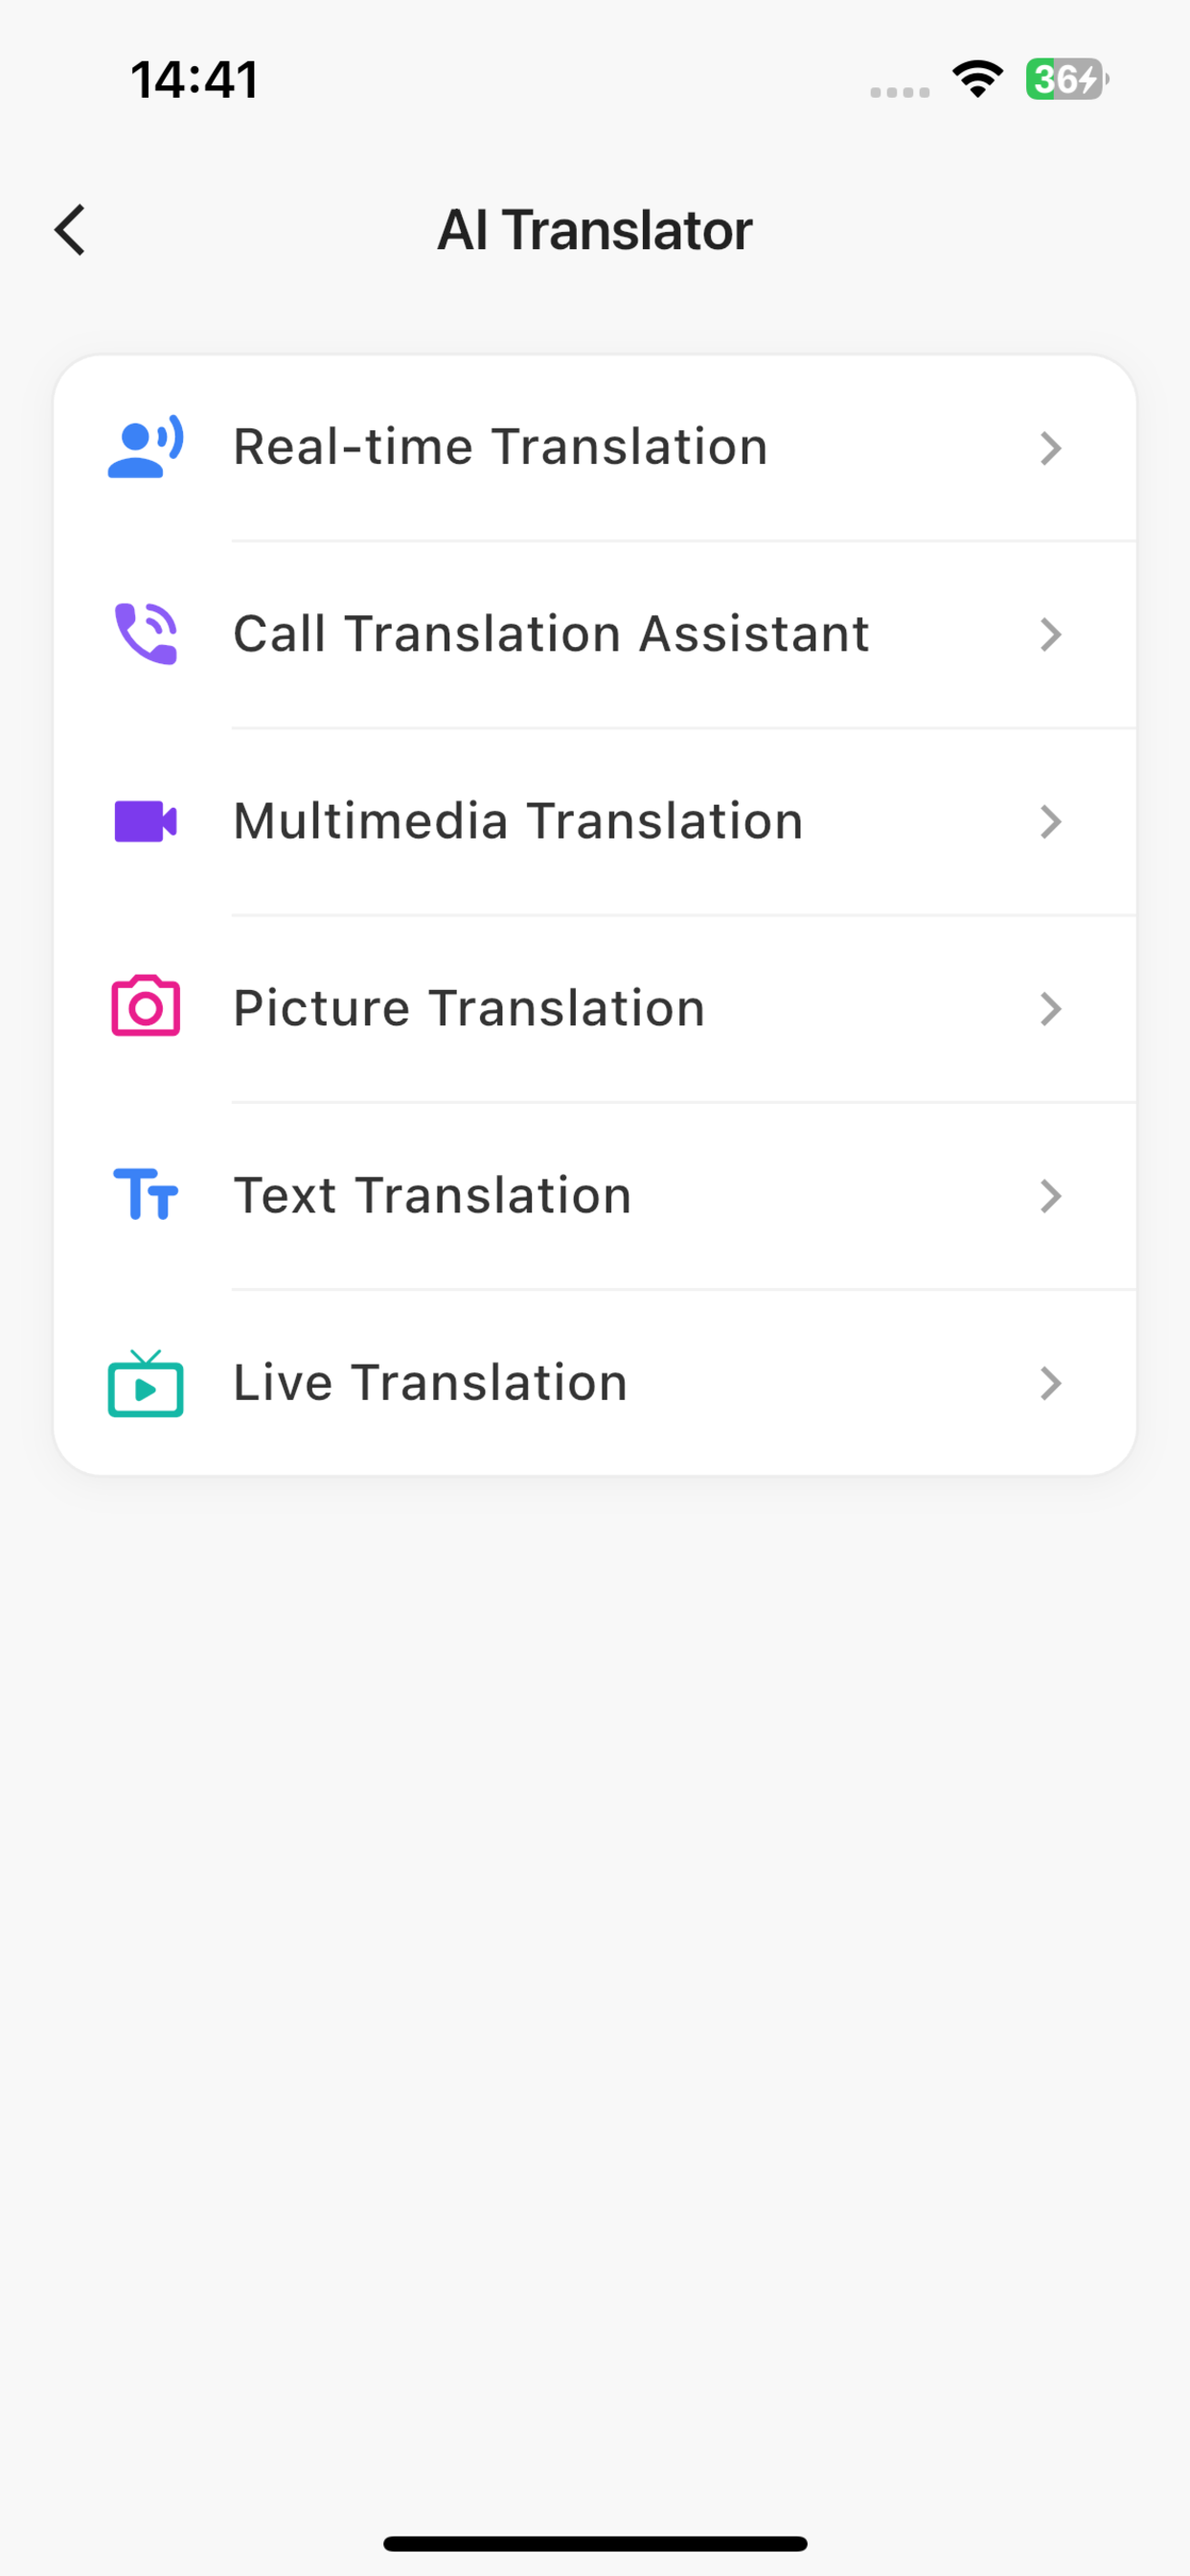
Based on iOS screenshots from the ZENSBUDS AI v1.1.0 App Store gallery. The connection image was edited with AI to change the example display name to “A Good Man”; the AI Translator image is unedited. Detail views are cropped for readability, with purple guide outlines added. Full-screen links show the uncropped images. Device artwork and displayed values are examples, not product specifications. Your screen may vary by app version or platform.
New to the app? Follow the sign-in guide below. The supplied sign-in screen is from iPhone; Android and individual permission prompts may differ.
APP ACCOUNT / SIGN IN
Use an email address you can access. Your app account is separate from product warranty registration.
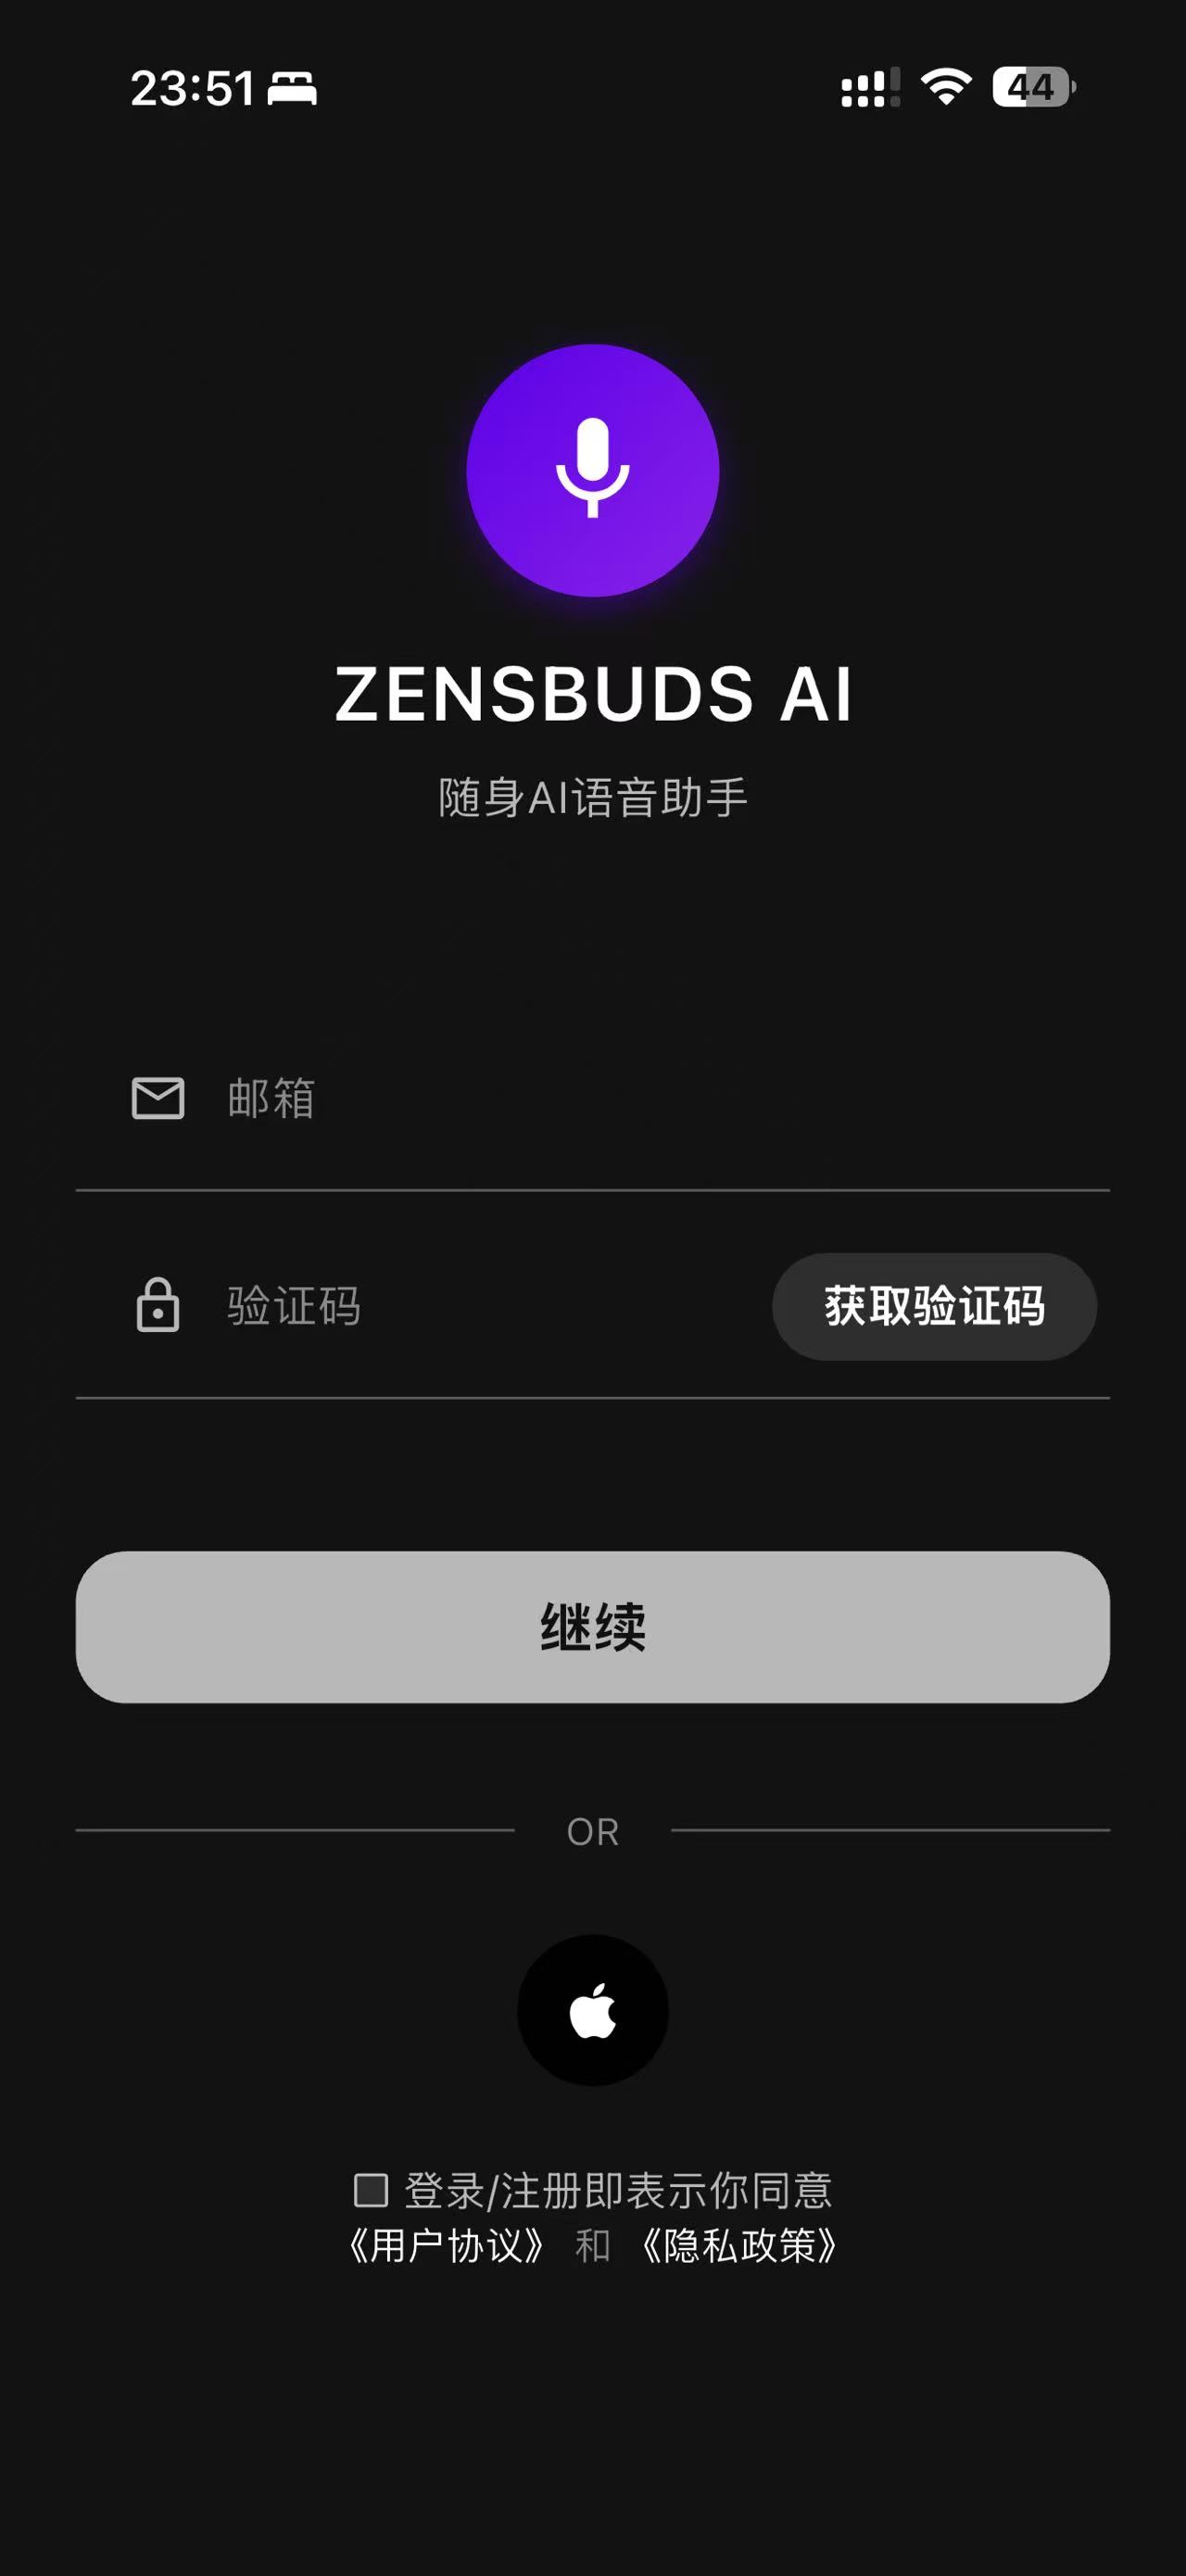
Enter your email in the Email field (邮箱). Read the User Agreement and Privacy Policy, and select the agreement checkbox if you agree.
Tap Get Verification Code (获取验证码), then check the message from ZENSBUDS AI in your email inbox. Check your junk folder if it does not arrive.
Return to the app, enter the code you received in Verification Code (验证码), then tap Continue (继续). Never share the code or enter it on this website.
After signing in, return to the device screen and check Connected. If needed, use Pair New Device and follow the app prompts.
An Apple sign-in option is visible on the supplied iPhone screen. Follow Apple's prompts if you choose it. This does not confirm the same option on Android.
When permission prompts appear, review the feature being requested and follow the app instructions. Exact permission screens remain to be verified.
APP SERVICES / USD
The following prices are displayed in the supplied AI Recharge (AI チャージ) screen. All amounts are in US dollars (USD), not Japanese yen.
Signing in to the app establishes the start date of your membership service period. Check the expiry date shown in the app. When that period expires, instant translation becomes unavailable; all other features remain available.
This describes the app service period, not the start date or duration of your hardware warranty. Submitting a warranty registration request does not start, extend or renew app service.
VIP Monthly Card
US$1.99Shown as VIP月間カードVIP Season Card
US$5.99Shown as VIPシーズンカードVIP Annual Pass
US$19.99Shown as VIP年間パスThese are AI Recharge prices—not a complete translation-fee schedule. The app has separate entries for AI Recharge, Translation Recharge, Meeting Recharge and Usage Statistics. Do not assume the AI plan includes all translation or meeting usage.
Open the app's gear/settings tab. In the recharge area, choose the service you need and review its package details before purchasing. Use Usage Statistics to check the usage information shown in the app.
Check the included allowance, validity period, renewal or cancellation terms, currency and final total on the purchase screen. Those details are not established by this screenshot. Any currency conversion or taxes must be checked at purchase.
Reference: owner-supplied app screens, 12 September 2026; USD confirmed by the owner. Prices and availability can change. Historical crowdfunding offers are not automatically included in current retail purchases. No payment is taken on this manual page.
05 / TOUCH CONTROLS
Find the outer face, then match each gesture to the left, right or either earbud below. Check the situation listed for each control.
Touch The Outer Face

Check the earbud and situation listed for each control below.
When connected, tap the right earbud once.
When connected, tap the left earbud once.
When connected, double tap either earbud to play paused music or pause playback.
While music is playing, triple tap the right earbud.
While music is playing, triple tap the left earbud.
When a call is incoming, double tap either earbud.
During a call, double tap either earbud.
While an outgoing call is dialling, double tap either earbud.
When a call is incoming, hold either earbud for 2 seconds.
While listening to music or in standby, hold the left earbud for 2 seconds. This shortcut is not available during calls.
The factory UI identifies Siri. The assistant launched on Android has not been confirmed; this is not described as a ZENSBUDS AI app shortcut.
LISTENING MODES
Each hold moves to the next mode. The first power-on starts in Normal; later power-ons remember the last mode used. A tone and mode prompt confirm a change.
Normal → ANC → Transparency → Normal
Balanced listening
Reduce outside sound
Hear your surroundings
Mode switching during calls and the exact spoken prompts remain unconfirmed.
When connected with music paused, putting the earbuds on starts playback. Removing them pauses the music. Optical wear detection is included in the factory-tested controls.
06 / CARE & SAFETY
Simple habits help keep the product comfortable, clean and safe.
Use a comfortable volume and limit long periods of high-volume listening.
Avoid water, excessive humidity and charging while the product is wet.
Keep the product and battery away from fire, direct heat and prolonged sun.
Do not open, modify or replace internal parts of the earbuds or case.
Avoid strong electromagnetic fields and extreme temperatures. If the product becomes wet, disconnect it from power and allow it to dry completely before use. Never dismantle, puncture, crush or expose the battery to high temperature. Keep earbuds and ear tips away from young children and pets, and store the product in a cool, dry place.
*Factory reference values, not a guarantee for every use. Test conditions for operating time and ANC were not supplied. These figures do not establish instant-translation runtime. No IP rating or operating-distance figure has been confirmed.
07 / TROUBLESHOOTING
Use the checks below when your earbuds do not connect as expected.
ZENSBUDS AI · Earbuds
Factory condition: earbuds powered on and not paired with a phone.
Check the starting state first. The factory has not clarified whether “not paired” also includes a previously paired phone that is merely disconnected. Do not assume these states are the same. If unsure, use the connection checks below or contact support before resetting.
The factory UI lists a 3–5-second hold for pairing and an 8–10-second hold to clear earbud pairing information. It does not specify whether the earbuds must be seated or whether the lid must be open. This is a reference, not a complete operating procedure; do not try it until those conditions have been confirmed.
Return both earbuds to the case, close the lid for a few seconds, then reopen it. Turn Bluetooth off and on again before checking the available-device list.
Place both earbuds in the charging case and confirm that both are seated on their charging contacts. Close and reopen the case, then reconnect.
Removing the earbuds pauses music through wear detection. If audio cuts out while you are wearing them, move closer to the connected device and away from dense wireless interference. Confirm that both the earbuds and connected device have sufficient charge.
Open Bluetooth settings and select “ZENSBUDS AI” again. Before clearing pairing information, read the reset starting conditions; being disconnected is not automatically the same as being unpaired.
SUPPORT & WARRANTY
For product or warranty inquiries, email support with your purchase channel and purchase date. Include your order or receipt number if available; no serial number is required.
Do not send passwords, verification codes, or license/activation codes. An inquiry does not automatically register or approve warranty coverage.
App membership is separate from hardware warranty. Newsletter signup is optional and is not required for support.
ks@zenstech.com